How do I get started?
- Login to Webex (rhody.webex.com)
- Along the left pane near the bottom click on [Webex Training] (or “WT” if the browser window is very thin)
- Underneath “Host a Session”, click on [Hands-On Lab]
- On the navigation bar, expand Host a Session, and then select Hands-on Lab.
What can I do when I get to the Hands-on Lab?
- Under the [Hands-On Labs] tab:
- View a list of the Hands-on Lab computers.
- View the schedule for each of the labs.
- Reserve computers for on-demand sessions.
- Under the [My Reservations] tab:
- View the sessions you have scheduled for in-session or on-demand Hands-on Lab.
- Change your reservations, such as inviting attendees and canceling reservations.
How do I connect to one of the machines and start using it?
Once you have arrived at the [Hands-On Labs] tab, click on any of the Reserve Computers links at the far right edge of the screen.

- Enter your name in the Topic
- Choose a lab/machine from the drop-down list.
- Enter the number of computers that you want to reserve (this should always be “1”).
- Set the Starting date and time. It can be for right now, or for some time in the future. The minute setting is in increments of 15 (00, 15, 30, 45) only.
- Set the Ending date and time. Please set the time limit accordingly. To provide as much accessibility as possible, please limit your connection time to 2 hours per session.
- Click the [Reserve] button.
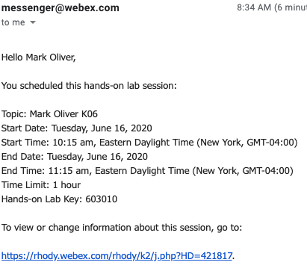
Once you have a computer reserved, you can click the [Go to My Reservations] button on the screen, or you can reconnect later and get to the [My Reservations] tab as described above. You also will receive an email from Webex with your reservation information for your records.
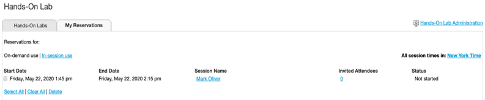
- The status of your reserved computer will be listed as “Not started” until the starting date/time have arrived.
When the starting date/time have arrived, a link to the remote computer will be available to you in your reservation list. Click on the link.
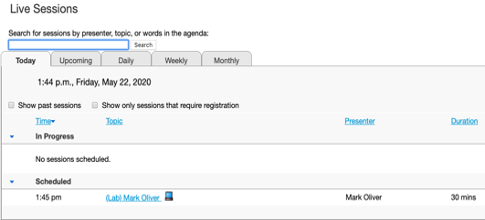
Click on the (Attend lab now) link at the top of the page.

- It will take about 20-30 seconds for your computer to establish a connection to the remote computer. Once the connection is established, you will see the remote computer, and you’ll be able to work on it as if you were sitting in front of it! There will be a timer in the lower right corner of your screen to let you know how much time you have left in your session.
- VERY IMPORTANT NOTES ABOUT YOUR CONNECTION TO THE REMOTE COMPUTER
- There is NO WAY to save files DIRECTLY from the remote computer to your own computer.
- We suggest that you save files to either the Desktop or My Documents folder.
- Once you have completed saving all of your files, login to your URI Gmail account (using a web browser on the REMOTE computer USING A PRIVATE/INCOGNITO WINDOW) and email those files to yourself!
- DELETE THOSE FILES FROM THE REMOTE COMPUTER! You don’t want the next person who connects to the remote computer to see what you have done!
- When you are done with the remote computer:
- MAKE TRIPLE SURE YOU’RE NOT LEAVING ANY DOCUMENTS BEHIND!
- Go to the Start button (on the remote computer) and click RESTART.
- Click on the [Leave Lab] button in the timer window – this will disconnect you from the remote computer.
If you do not manually end the Hands-on Lab reservation, it ends automatically when your reservation expires. A message appears on your screen 15 minutes before your reservation expires.
Please contact the IT Service Desk with any questions or problems. (401.874.HELP or helpdesk@uri.edu)